In this blog post, I’ll walk you through the process of creating a GUI in Visual Bukkit 6 from scratch. If you just want the essence of GUIs, watch my video instead.
1. GUI Manager
To start integrating GUIs into your plugin, you need to enable the GUI Manager module. Go to ‘Plugin Settings’ > ‘Modules’ and enable the GUI Manager by selecting it and clicking >.

2. Create the GUI
Create the GUI component:
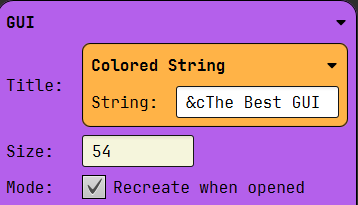
To start developing the GUI, go to ‘Add Component’ and select GUI (just like Commands or Events). You’ll now be greeted with a purple box, just like other components. Into this box you need to add the (coloured) title of the GUI and the size. The size must be a multiple of 9 up to 54. So 9, 18, 27, 36, 45 and 54.
The “Recreate when opened” mode does exactly what it says, it recreates the GUI for each player. This is useful if the GUI content changes dynamically from player to player. If the GUI is static and shared between players, rebuilding it repeatedly wastes resources.
I said in the video that you should always check this if you’re a beginner, because it avoids possible weird behavior.
Filling in the GUI
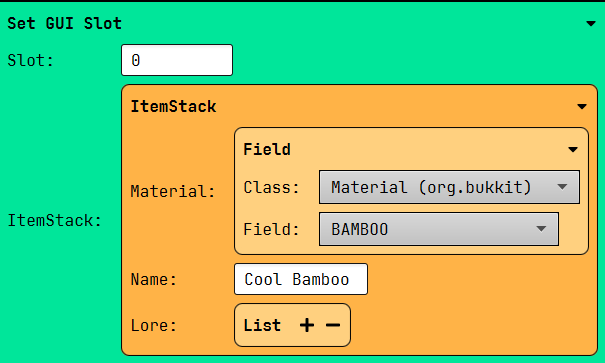
We now have a blank canvas, so to fill it with items, drag in ‘Set GUI slot’. These slots start from 0 up to your chosen size minus 1. In this case the slots go from 0 to 53.
Next we have the itemstack. More information can be found here.
3: Bringing the GUI to life!
Our GUI now has some icons, but nothing happens when we click on them. To change this, add the GUI Click Handler component. This is where we can add all our logic.
The movement of items in the GUI is already blocked!
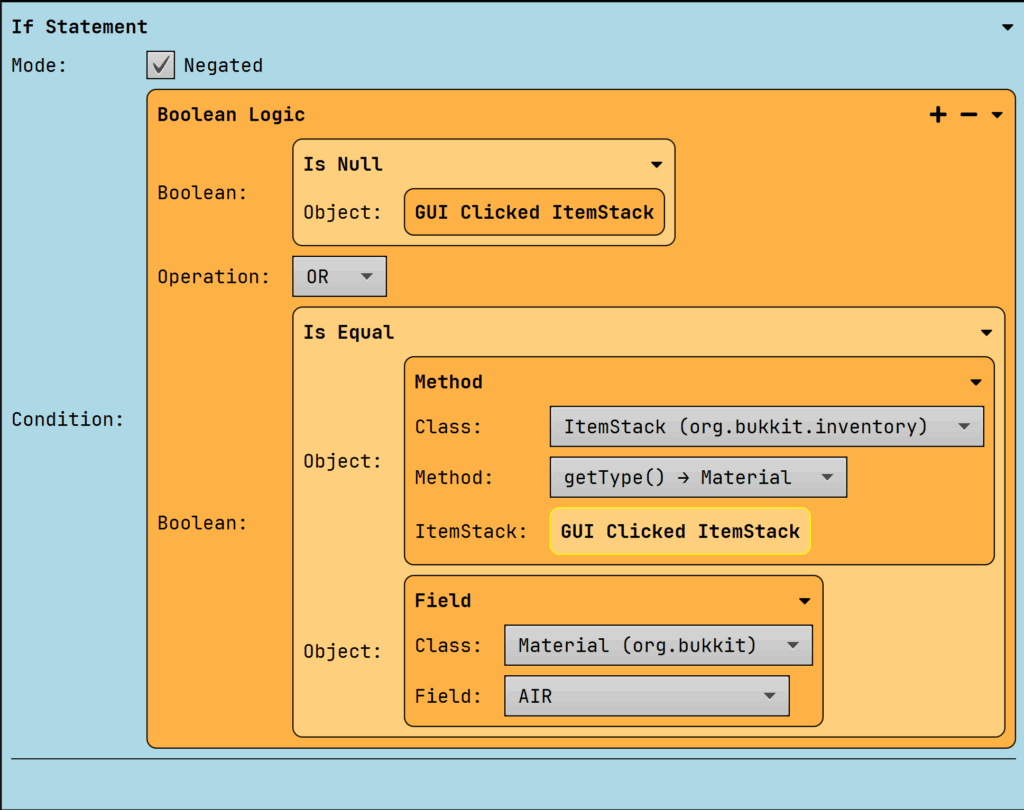
Let’s start by adding an if statement to check if the clicked ItemStack is AIR or null.
Drag in an if statement, set the mode to negated, add a Boolean Logic, where we check if the GUI Clicked ItemStack Is Null OR if the GUI Clicked Itemstack is equal to AIR.
Inside the If Statement, add another If statement checking if the clicked GUI slot is equal to your set GUI slot. You can also compare the GUI Clicked ItemStack with a material, but this isn’t recommended if you have the same items. Inside the second if statement, you can write anything you want it to perform.
4. Opening the GUI
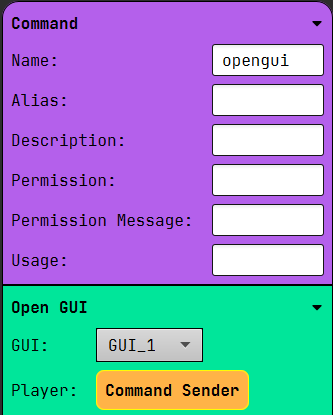
To open the GUI, use Open GUI. The green box gives you two options: which GUI to open and for whom to open it.
All the GUI blocks
Purple Blocks:
- GUI Click Handler: Manages all the click events in the GUI.
- GUI: The GUI/inventory itself.
Green Blocks:
- Open GUI: Opens the GUI.
- Set GUI Slot: Sets a GUI slot with a specified ItemStack.
Orange Blocks:
Italic means it’s only available in the GUI component. The other components can only be used in the GUI Click Handler.
- GUI Click Type: The way the GUI was clicked. Here yu can find all the possibilities.
- GUI Clicked Inventory: The Clicked Inventory
- GUI Clicked Itemstack: The Clicked Itemstack in the GUI.
- GUI Clicked Slot: Returns the clicked slot in the GUI as an integer.
- GUI Clicker: The player who clicked the GUI.
- GUI Inventory Click Event: The Click Event of the GUI.
- GUI Inventory: The GUI inventory.
- GUI Player: The Player for which the GUI is being created.
Leave a Reply